
HVLP Spray Gun Techniques for Achieving a Smooth Finish

Looking to achieve that perfect, seamless finish on your next painting project? Well, you’re in luck because today I’m going to let you in on some HVLP spray gun techniques that will have you painting like a pro in no time. Whether you’re a seasoned painter or just getting started with your DIY adventures, these tips are bound to make a world of difference. Oh, and here’s a crazy fact to get you even more excited: Did you know that the average human eye can distinguish between over 10 million different colors? Pretty mind-blowing, right? So, let’s dive in and unlock the secrets to achieving that smooth finish you’ve always dreamed of!
Spray with ease and precision – Explore our top-selling HVLP gravity feed spray guns!


Understanding HVLP Gravity Feed Spray Guns
If you’re looking to achieve a smooth finish when painting, a HVLP gravity feed spray gun might be just what you need. In this blog section, we’ll explore what gravity feed spray guns are and how they work. We’ll discuss the basic components of the spray gun and why it is a popular choice for achieving a professional-quality result.


What is a HVLPGravity Feed Spray Gun?
A gravity feed spray gun is a type of spray gun that uses gravity to deliver the paint or coating onto the surface being painted. Unlike conventional spray guns, where the paint is fed from a bottom-mounted container, gravity feed spray guns have a cup on top of the gun that holds the paint. The force of gravity pulls the paint down into the gun, where it is atomized and sprayed onto the surface.
How Does a Gravity Feed Spray Gun Work?
To understand how a gravity feed spray gun works, let’s look at its basic components:
- Fluid Nozzle and Needle: These components control the flow of paint and determine the size of the spray pattern. The fluid nozzle and needle work together to regulate the amount of paint being sprayed.
- Air Cap: The air cap helps to atomize the paint by creating a fine mist of particles. It plays a crucial role in achieving a smooth finish.
- Cup: The cup on top of the spray gun holds the paint. It is typically made of metal or plastic and comes in different sizes, allowing you to choose the capacity that suits your project.
- Air Inlet: The air inlet connects the spray gun to an air compressor, which provides the necessary airflow to atomize the paint.
Once you have filled the cup with paint, the force of gravity pulls the paint down into the gun. As you pull the trigger, the air compressor forces air through the gun, atomizing the paint and creating a spray pattern. By adjusting the fluid nozzle and needle, as well as the air pressure, you can control the flow of paint and the size of the spray pattern.
Why Choose a HVLP Gravity Feed Spray Gun?
HVLP Gravity feed spray guns have gained popularity among DIYers and professionals alike for several reasons:
- Efficiency: With a gravity feed spray gun, you can use almost all of the paint in the cup, minimizing waste. The design ensures that the paint is constantly being pulled down, allowing for continuous spraying without interruption.
- Versatility: HVLP Gravity feed spray guns can handle a wide range of materials, from thin stains and lacquers to thicker paints and primers. This versatility makes them suitable for various projects, such as automotive painting, furniture refinishing, and even small touch-ups.
- Ease of Use: Gravity feed spray guns are generally easier to control than other types of spray guns. The top-mounted cup provides better balance and maneuverability, reducing hand fatigue during extended painting sessions.
- Smooth Finish: The atomization achieved by a gravity feed spray gun results in a fine mist of paint particles, leading to a smooth and even finish. This is especially important when applying clear coats or high-gloss finishes, where imperfections can be more noticeable.
Choosing the Right Spray Gun and Nozzle Size
When it comes to achieving a flawless finish on your painting projects, selecting the right spray gun and nozzle size is crucial. The combination of these two factors can greatly influence the overall quality and efficiency of your work. In this article, we will delve into the importance of choosing the appropriate equipment and provide guidelines to help you make the right decision based on your specific needs.


The Importance of Selection
Selecting the right gravity feed spray gun and nozzle size can make a world of difference in your painting experience. Here are a few key reasons why this decision is so important:
- Quality of Finish: The spray gun and nozzle size determine the atomization of the paint particles, resulting in a smooth and even application. Using the wrong equipment can lead to an uneven finish with visible streaks or overspray.
- Efficiency: By choosing the right spray gun and nozzle size, you can optimize the paint flow and minimize overspray. This not only saves you time but also reduces material waste, making your projects more cost-effective.
- Compatibility: Different paints and surfaces require different spray guns and nozzle sizes for optimal results. Using the wrong equipment can lead to clogging, poor adhesion, or even damage to the surface.
Now that we understand the importance of selection, let’s dive into the factors to consider when choosing your equipment.
Factors to Consider
- Type of Paint: Different paints have varying viscosity levels, which determine the size of the nozzle opening needed for proper atomization. Thicker paints, such as latex or enamel, require larger nozzle sizes, while thinner materials, like lacquers or stains, work best with smaller nozzles.
- Surface: The type of surface you’ll be painting also plays a role in selecting the appropriate spray gun and nozzle size. Smooth surfaces typically require finer atomization, while rough surfaces may benefit from a larger nozzle to ensure complete coverage.
- Project Size: Consider the scale of your project when choosing your equipment. Smaller projects may require a lighter and more maneuverable spray gun, while larger projects may call for a heavier-duty model with a larger paint capacity.
- Pressure Requirements: Check the pressure requirements of your chosen spray gun and ensure it matches the capabilities of your air compressor. Using incompatible pressure settings can result in poor atomization or equipment damage.
Recommended Equipment
To help you make an informed decision, we have compiled a list of recommended spray guns and nozzle sizes based on common painting scenarios:
- Brands: Look for reputable brands like Devilbiss, Graco, or Wagner for reliable and high-quality spray guns.
- Nozzle Sizes: The following table provides a general guide for selecting the appropriate nozzle size based on the type of paint and surface:
| Paint Type | Nozzle Size (mm) |
|---|---|
| Latex/Enamel | 1.8 – 2.5 |
| Lacquer/Stains | 1.2 – 1.5 |
| Primers | 2.0 – 2.5 |
| Clear Coats | 1.3 – 1.8 |
Remember that these are general recommendations, and you should always consult the manufacturer’s guidelines for your specific paint and spray gun model.
Proper Technique for Using a HVLP Gravity Feed Spray Gun
In order to achieve professional-looking results with a gravity feed spray gun, it is important to master the proper technique. By understanding the correct distance to hold the gun, the angle of application, and the recommended overlapping strokes, you can ensure a seamless finish that will make your project stand out. In this article, we will guide you through these key aspects of using a gravity feed spray gun, providing useful tips and practical advice.
Holding the Gun at the Right Distance
To begin, it is crucial to hold the gravity feed spray gun at the correct distance from the surface you are painting. This distance can vary depending on the specific gun and paint product you are using, so be sure to consult the manufacturer’s guidelines. As a general rule of thumb, a distance of 6 to 8 inches is commonly recommended.

HVLP Spray Gun Techniques
Key tips:
- Check the manufacturer’s guidelines for the recommended distance.
- Maintain a consistent distance throughout the application for an even coat.
- Adjust the distance as needed for different paint products or surfaces.
Applying at the Correct Angle
The angle at which you hold the gravity feed spray gun also plays a vital role in achieving a smooth and even finish. It is best to hold the gun perpendicular to the surface, which means the nozzle should be aimed directly at the area you are painting. This ensures that the paint is evenly distributed and minimizes the risk of streaking or uneven coverage.
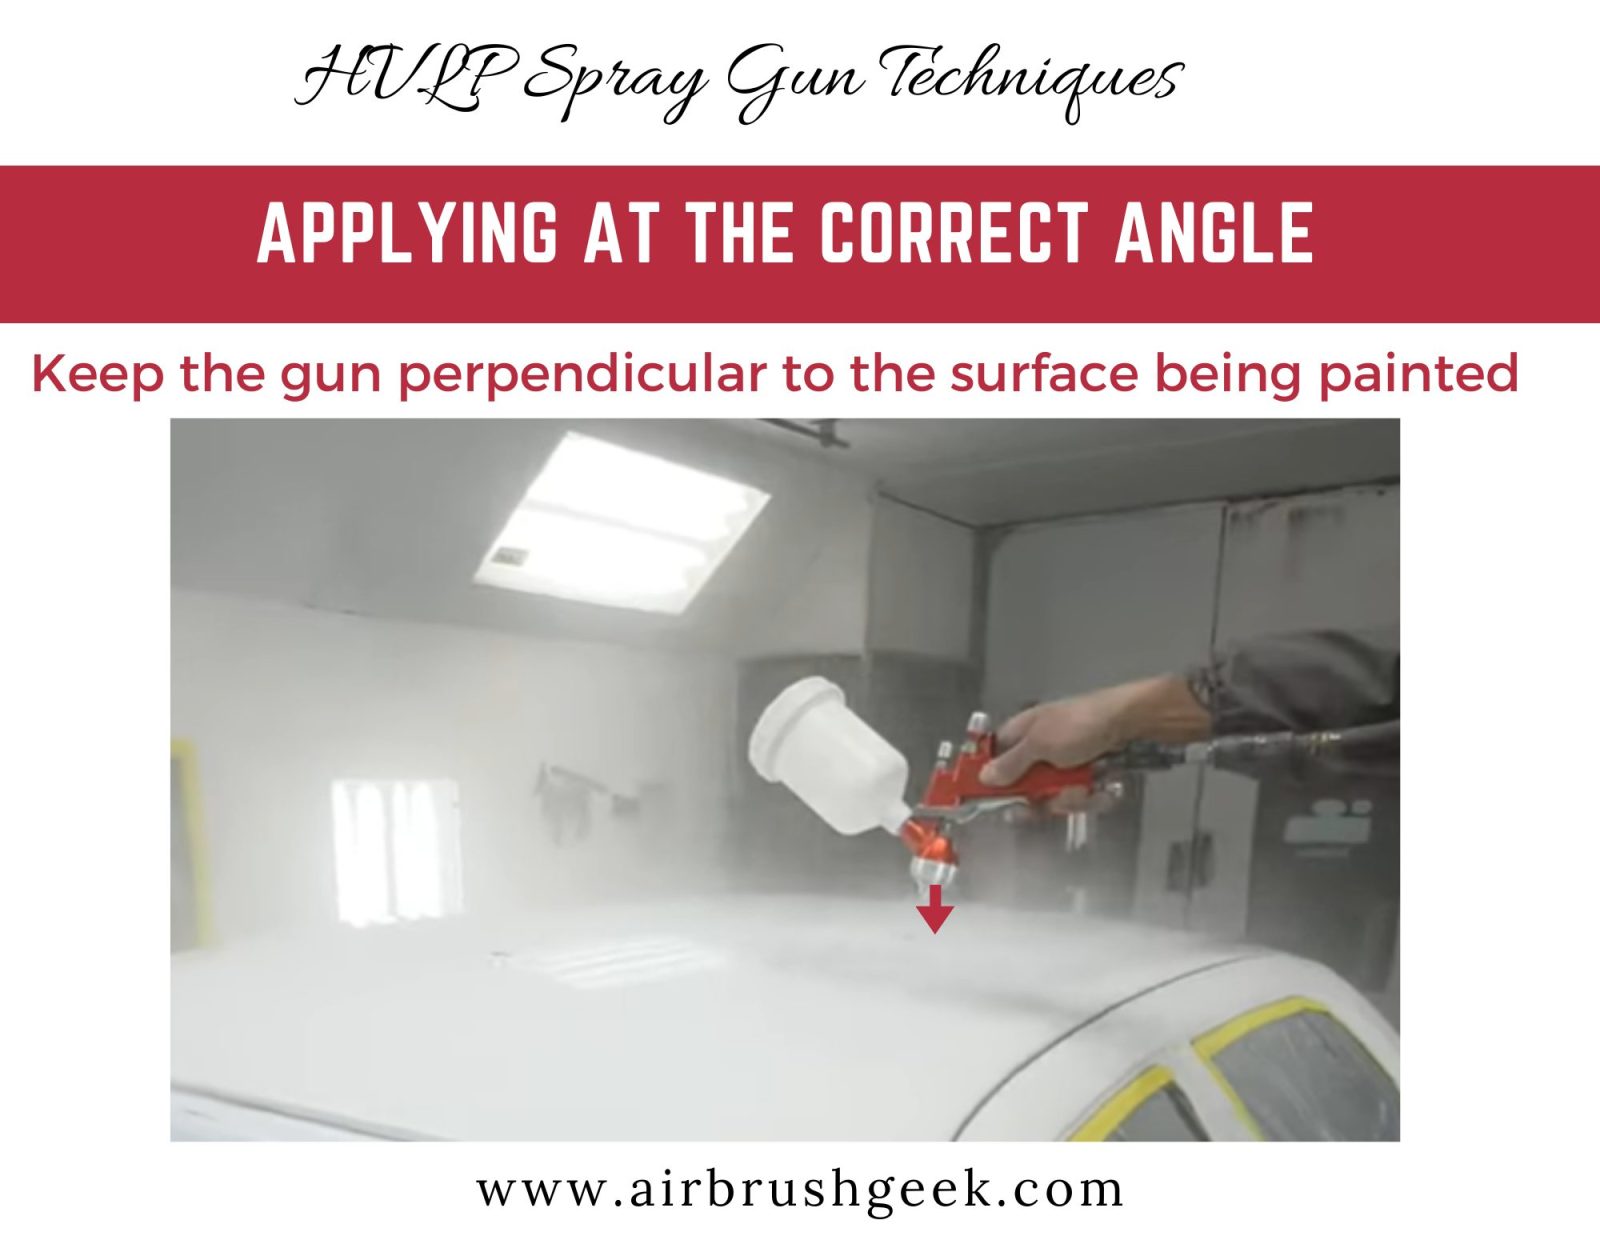
Key tips:
- Keep the gun perpendicular to the surface being painted.
- Maintain a steady hand to prevent unintentional tilting.
- Practice your technique on a scrap surface to get comfortable with the proper angle.
Overlapping Strokes for a Seamless Finish
To achieve a seamless finish, it is important to use overlapping strokes when applying the paint. This technique ensures that the entire surface is evenly coated and helps to eliminate visible lines or streaks. Start by spraying in a horizontal direction, making sure to overlap each stroke by about 50%. Once you have covered the entire surface, repeat the process in a vertical direction to further enhance the evenness of the finish.
Key tips:
- Use smooth and consistent strokes.
- Aim for a 50% overlap between each stroke.
- Pay attention to any missed spots and touch them up as necessary.
HPLV spray gun techniques: Tips and Tricks for Achieving a Smooth Finish
Are you tired of those unsightly brush strokes and uneven paint finishes? Don’t worry, we’ve got you covered! In this section, we’ll share some tried and tested tips and tricks to help you achieve a flawless and smooth finish on your painting projects. So grab your brushes, roll up your sleeves, and let’s dive in!
1. Consider Paint Viscosity
The viscosity of your paint can greatly affect the smoothness of the finish. Different paints have different viscosities, so it’s important to choose the right one for your project. Here are a few things to keep in mind:
- Thick or Heavy-Bodied Paints: These paints are great for creating texture, but they can also leave behind brush strokes. If you want a smooth finish, consider using a thinner paint or adding a paint conditioner to improve flow.
- Flow Mediums: Flow mediums, such as Liquitex Flow-Aid or Golden Acrylic Flow Release, can help improve the flow of your paint, resulting in a smoother finish. Simply mix a small amount with your paint before applying.
- Spray Paints: If you’re using spray paint, choose a brand that offers a smooth finish. Brands like Montana Gold or Rust-Oleum Painter’s Touch are known for their excellent coverage and smooth results.
2. Adjust Air Pressure
If you’re using an airbrush or a spray gun, adjusting the air pressure can make a significant difference in the smoothness of your finish. Here’s what you need to know:
- Too High Pressure: If the air pressure is too high, it can cause the paint to atomize too much, resulting in a rough and spotty finish. Lower the pressure to a level where the paint is evenly distributed.
- Too Low Pressure: On the other hand, if the air pressure is too low, the paint may not atomize properly, leading to a grainy or streaky finish. Increase the pressure until you achieve a fine mist.
- Testing on a Scrap Surface: It’s always a good idea to practice on a scrap surface before tackling your actual project. This will allow you to adjust the air pressure and get a feel for how the paint behaves.
3. Practice on Test Surfaces
Practice makes perfect, and this holds true for achieving a smooth finish. Before diving into your main project, take the time to practice on test surfaces. This will give you the opportunity to experiment with different techniques, paint viscosities, and air pressures. Here’s why it’s important:
- Surface Preparation: Test surfaces help you understand the importance of proper surface preparation. Sanding, priming, and cleaning the surface can greatly impact the smoothness of the finish.
- Finding the Right Technique: Trying out different techniques on a test surface allows you to find the one that works best for you. Whether it’s brush strokes, cross-hatching, or stippling, practice will help you master your desired technique.
- Identifying Potential Issues: Test surfaces can help you identify potential issues early on. If you notice any streaks, blotches, or unevenness, you can make the necessary adjustments before tackling your main project.
In conclusion, achieving a smooth finish requires attention to detail and the right techniques. By considering paint viscosity, adjusting air pressure, and practicing on test surfaces, you’ll be well on your way to achieving that flawless result you’ve always wanted. So go ahead, put these tips and tricks to the test, and enjoy the satisfaction of a perfectly smooth finish!
Remember, practice makes perfect, so don’t be discouraged if you don’t achieve perfection right away. With time and experience, you’ll become a master of smooth finishes. Happy painting!
Wrap it up with a flawless flourish!
In conclusion, we’ve covered a range of HVLP spray gun techniques that are key to achieving a flawless finish. By mastering the fundamentals, selecting the appropriate equipment, employing proper technique, and incorporating the provided tips and tricks, you’ll undoubtedly enhance your painting skills. Never forget to practice and experiment to discover the ideal approach for your unique project. Wishing you joyful painting endeavors!


