
How to spray base coat clear coat?

Applying a base coat on a car is an important step in the painting process as it ensures a professional-looking finish. To start, prepare the car’s surface by cleaning it thoroughly and sanding any imperfections. Next, prime the surface with a high-quality automotive primer to create an even base. Let the primer dry before lightly sanding it to ensure smoothness. Now, it’s time to mix and apply the base coat using a spray gun or paint brush. Make sure to apply multiple thin coats, allowing sufficient drying time between each layer. Once the base coat is dry, you can proceed to apply the clear coat for added protection and shine.
Did you know that the world record for the most expensive car ever sold is a 1962 Ferrari 250 GTO, which was sold for a staggering $48.4 million?
A Comprehensive Guide to Painting Your Car: Base Coat/Clear Coat
Prepare the car
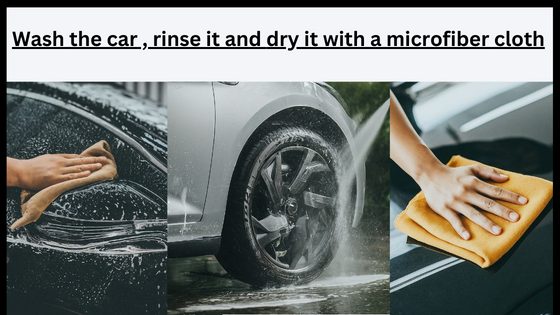
Start by thoroughly cleaning the car’s surface to remove any dirt, grease, or contaminants. Use a mild detergent and water to wash the entire car. Grab a sponge or soft cloth and apply the soapy water to the surface, making sure to cover every inch. Scrub gently in circular motions to dislodge any stubborn grime. Once you’ve covered the entire car, rinse it well with clean water to remove all the soap residue. Be thorough in this step to ensure that no soap remains on the surface. Lastly, allow the car to dry completely before proceeding to the next step. Use a microfiber cloth or allow the air to naturally dry the car. By starting with a clean surface, you’ll ensure that the subsequent steps are more effective in preparing your car.
Sand the surface
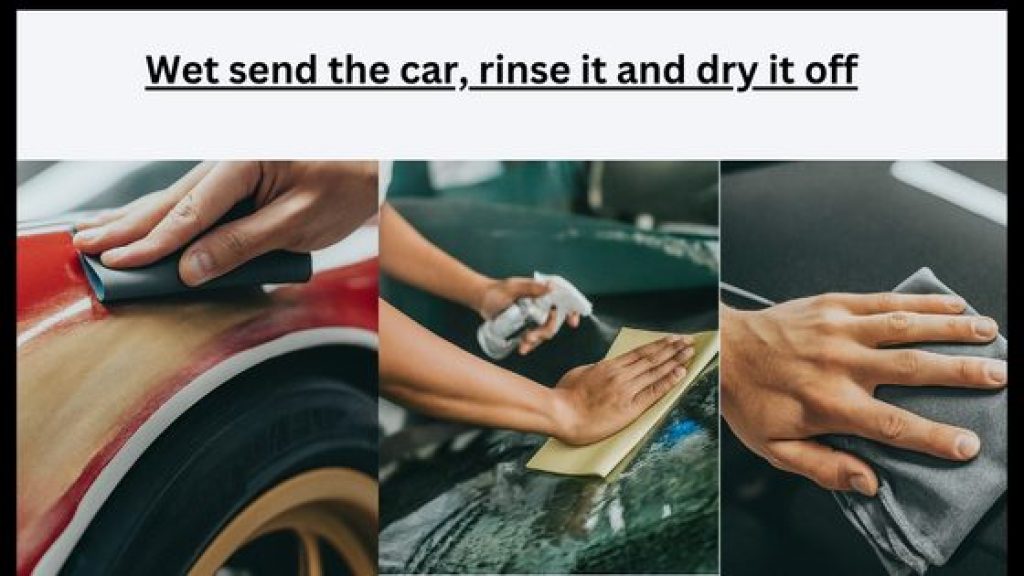
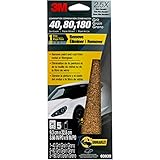
You can start to sand any rust spots or bigger scratches on your car with 180-320 grit sandpaper. You can use a spray bottle filled with water and a little bit of automotive soap or even some dish water.
Dip the sandpaper in the soapy water and gently sand the car’s surface using a back-and-forth motion. Keep the surface wet at all times.Be sure to apply even pressure to ensure a smooth and consistent finish.
Make sure you don’t press too hard to avoid gouging the paint.Frequently rinse the area to remove any built-up material.
Sand only as much as necessary to remove imperfections.This process helps to eliminate imperfections like scratches or rough areas. Once the major imperfections are out, you can progress using 1000-1500-grit wet sandpaper.
Repeat the sanding process, making sure to wet sand each area uniformly. Each successive grit will remove the scratches from the coarser grit before it.
Once you have finished sanding, use a microfiber cloth to wipe the surface clean and remove any dust or debris. This will leave the surface ready for the next step in the car repair or painting process.


 Amazon.com
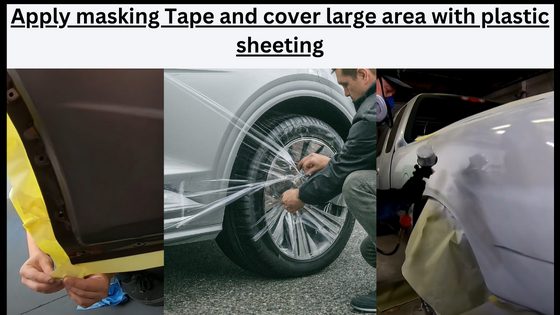
Apply the Masking Tape
You need to apply masking tape to the edges of the area you want to paint. Ensure the tape is straight and firmly pressed down to avoid any gaps. You always open the doors and and mask from the inside out. This is crucial for areas adjacent to the surfaces being painted, like window trims, door handles, grills, etc.
Use masking paper or plastic sheeting to cover larger areas. Attach the masking paper or the plastic to the tape already in place. In some cases, like when painting a door, you might need to tape and paper off the adjacent panel to avoid overspray.
Use masking paper or plastic to cover all windows, lights, and grills. Ensure the masking extends beyond the edges of these areas to provide a buffer zone.If painting near the wheels, cover them entirely with plastic sheeting or large masking bags designed for this purpose.
Press down all edges of the tape and paper/plastic to ensure they are sealed. Pay special attention to gaps where overspray can easily penetrate, such as panel gaps.
Go over the car once more to ensure that all non-painted surfaces are well protected. Look for any exposed areas or loose ends that might flap around when the paint is being applied.
 Amazon.com
Apply a primer
Apply the primer before the base coat. Prepare the surface by cleaning it thoroughly and removing any debris or old paint. Degrease all surfaces before applying the primer. Choose an automotive-specific primer and apply it in thin, even coats. Wait for each coat to dry completely before applying the next layer.


Mix the base coat
To mix the base coat, the first step is to carefully read and follow the instructions on the paint can. Make sure you have a clean container that is suitable for mixing the paint. This will help prevent any contamination and ensure optimal results.
Next, using a stirring stick or a paint mixer attachment on a drill, thoroughly stir the base coat paint. Make sure to mix it well to achieve a consistent color. This is important as an evenly mixed paint will provide a more uniform and professional finish.
Continue stirring the paint until you no longer see any separated pigments or streaks. This may take a few minutes, so be patient and keep stirring.
Remember, it is essential to follow the instructions provided on the paint can as different base coat paints may require specific mixing ratios or techniques. By following these steps and mixing the base coat properly, you can achieve the desired finish for your project.
Apply the base coat
To apply the base coat, grab a high-quality paint gun or spray can. Make sure it is in good working condition. Place the nozzle a few inches away from the surface of the car. Start at the top and work your way down, keeping the gun or spray can in motion at all times. Apply the base coat in thin, even layers, ensuring complete coverage of the car’s surface. If necessary, apply multiple coats, allowing each coat to dry before moving on to the next one. Remember to follow the instructions on the paint product for drying times.
Allow the base coat to cure
After applying the base coat, it is crucial to allow it to cure properly, following the manufacturer’s instructions. This step is essential for achieving a durable and long-lasting finish on your car. To begin, ensure that the vehicle is in a well-ventilated area during the curing process to dissipate any fumes and aid in proper drying.
Next, carefully check the manufacturer’s guidelines for the recommended curing time. Typically, this will involve letting the paint dry for a specific period before proceeding with additional coats or any other type of contact or manipulation of the painted surface. It is critical to adhere to these instructions to avoid compromising the integrity of the paint job.
During the curing process, it is important not to expose the vehicle to sources of excessive heat or direct sunlight, as this can hinder the curing process and result in a less durable finish. Additionally, avoid touching or putting any objects on the painted surface to prevent any accidental damage or blemishes.
By following these simple yet crucial steps, you will ensure that the base coat cures properly, leading to a professional and long-lasting paint job on your car.
The Final Touches
In conclusion, applying a base coat on a car requires careful preparation, the right materials, and proper technique. By following the steps outlined in this blog post, you can ensure a successful application. Remember to take the time to prepare the surface, apply a primer, mix the base coat correctly, and apply it in thin, even layers. Allowing the base coat to cure before proceeding with the topcoat is crucial for a professional finish. With patience, attention to detail, and practice, you can achieve excellent results and give your car a fresh, beautiful new look.
Necessary items


Pro Tips for Base Coats
Preparing the Car Surface
- Preparation: Start by thoroughly cleaning the car’s exterior to remove any dirt or debris. This ensures a smooth painting surface
- Masking: Use masking tape and plastic sheets to cover areas that you don’t want to be painted, such as windows, lights, and handles. This protects them from paint overspray
- Sanding: Prior to painting, sand the car’s surface to remove any imperfections or old paint. Start with a low grit sandpaper and gradually work your way up to a finer grit for a smooth finish
- Priming: Apply a coat of automotive primer to enhance paint adhesion and provide a uniform base. Choose a primer suitable for your car’s surface and follow the manufacturer’s instructions
- Painting: Use an automotive paint specifically designed for car exteriors. Apply the paint in thin, even coats to avoid drips or runs. Start from the top and work your way down, maintaining a consistent distance from the car surface
- Clear Coating: Once the paint has dried, apply a clear coat to protect the color and add a glossy finish. Follow the product instructions for proper application, and consider applying multiple coats for durability
- Final Touches: After the clear coat has dried, remove the masking tape and plastic sheets carefully. Inspect the paint job for any imperfections and make any necessary touch-ups
- Remember, painting a car professionally takes practice and patience. It is recommended to do thorough research, seek guidance from experienced individuals, and consider taking a beginners’ auto body class to learn more about the process
Frequently Asked Questions about Professional Car Painting and How to spray base coat clear coat
To properly apply clear coat for a glossy finish, follow these steps:
- Prepare the surface: Ensure that the surface you are applying the clear coat to is clean, smooth, and free from any dirt, dust, or imperfections. Sanding the surface lightly can help create a better bond for the clear coat.
- Choose the right clear coat: There are different types of clear coats available, such as spray cans or two-part clear coat systems. Choose the one that suits your project and follow the manufacturer’s instructions.
- Protect yourself and the surrounding area: Wear protective gloves, a mask, and goggles to avoid any contact with the clear coat. Prepare your workspace by covering surrounding objects or areas to avoid overspray or spills.
- Apply the base coat: If you are working on a painted surface, apply the desired base coat and allow it to dry completely before proceeding to the clear coat application.
- Mix or shake the clear coat: If you are using a two-part clear coat, follow the manufacturer’s instructions for mixing the components. If you are using a spray can, give it a good shake for a few minutes to ensure proper mixing.
- Start with a thin coat: Begin the application by spraying a thin and even coat of clear coat over the surface. Hold the spray can or gun about 6-8 inches away from the surface and move your hand in a smooth and continuous motion.
- Allow it to dry: Allow the first coat to dry for the recommended time specified by the manufacturer. This typically ranges from 5-15 minutes, but it’s important to follow the instructions to ensure proper drying.
- Apply additional coats: Apply 2-3 additional coats of clear coat, allowing each layer to dry before applying the next. This will help build up a better depth and glossy finish. Be sure to lightly sand between coats to ensure adhesion and remove any imperfections.
- Let it cure: After the final coat, allow the clear coat to cure for the recommended time, which is usually 24-48 hours. This will ensure that the clear coat fully hardens and achieves maximum glossiness.


