The Complete Airbrush Equipment List: Start Airbrushing the Right way
The right Airbrush setup for beginners
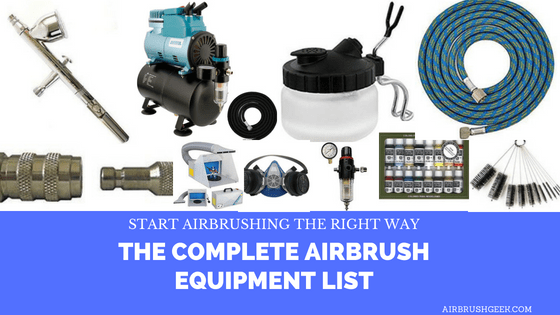
If you want to start airbrushing, you are wondering what is the right airbrush setup for beginner you obviously need an airbrush to start with, but not only. An airbrush equipment list consist of few others elements, some of them absolutely necessary, some other more optional: You will need an air-hose, an air source (most likely a compressor), some paint and also something to paint (Minis, RC Car, T-Shirt, Plastic Model, Cake decorating..etc).
There are also lots of airbrush accessories that will make you life easier for cleaning your airbrush. or to mixing your paint. And of course I want also to speak about airbrush safety, something that is very important and that you shouldn’t overlook.
Here I am going to make a list of airbrush material that you will need to consider.
The Airbrush
Double action, single action, gravity feed or siphon feed, there is plenty of airbrushes to choose from out there.Each airbrush has different characteristics that would suit some application better than others.
Check my post about finding the best airbrush for beginners
What am I going to paint?
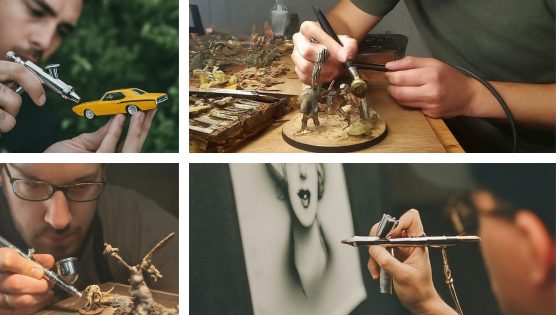
The airbrush is a fantastic tool can be used in numerous different arts going from model making, t-shit or shoe airbrushing, to cake decorating, illustration or even make up or nail art. What really matter here, I mean the question you should ask yourself when you start airbrushing is what are you going to use to for?What do you want to do with your airbrush? You won’t need the same type of airbrush whether you are going to airbrush t-shirts or if you are going to airbrush minis. Are you going to pain small surfaces, large surfaces? So first, make sure you identify the type of work you are going to do with your airbrush.
Cheap Vs Branded Airbrush?
I personally think that rather than buying a low end airbrush model, you should invest a bit more money and buy a quality airbrush from a reputable brand .That way, if you have an issue with a part (needle bent, damaged nozzle…) you will be able to order spare parts. Something you won’t be able to do if you buy a low end airbrush. I know some people think the opposite and are just fine using a cheap Chinese airbrush, but it is my personal view. Ultimately they are made of poor materials and will either brake or end up frustrating you and maybe even discourage you in your airbrushing journey. Well-known airbrush brand are for instance IWATA (Iwata-Medea Eclipse HP CS, Iwata Revolution, Iwata Neo), Badger (Badger patriot 105) or even Paashe (Paasche Talon) and Hannsa. Those brand offer a wide catalogue of quality products and an equally wide price range.
Check out also the Airbrush reviews I have done on this website.
The Air Source
For your airbrush to work, you will need an air source to be able to spray. An adequate supply of air is a crucial factor to the performance of your airbrush. So before you start airbrushing, consider those different types of air source.
Airbrush Air propellant cans:
They are compact and silent but of limited capacity, so if you plan to spray quite often with your airbrush, this solution will become a very expensive one.
You can probably only expect 10 to 15 min usage time with a airbrush air propellant can. So if you need to paint a lot, this is definitely not the cheapest solution.
Airbrush air propellant can be use by airbrush beginners that want to learn how to airbrush but that don’t have the money yet to buy a compressor,
If you are planning to paint models, you can expect an air propellant can to last for about 1 or 2 models depending on size/coverage/etc.
I would rather advice to invest a bit more money in a compressor.
CO2 Tanks:
Co2 tanks can be refilled. They can operate at higher pressure than air propellant cans so an air regulator is essential. Good things about them is that they don’t require electric power and they are very silent.
Co2 tank size
The Co2 air tanks can be bought in different sizes: 5lb (pound) , 10 lb up to 100 lb Co2 air tank.
If you are airbrushing plastic models or if you are a railway modeler, a 5 lb Co2 tanks should be enough.
If you are airbrushing t-shirts, you will need to get a larger Co2 tank as you are going to use more air.
Co2 tank refill cost:
You can find them in most hardware shop, paintball shop…before going that route, I would check the place in your area that can refill Co2 tanks. If you buy them online, they will be shipped empty (to avoid safety hazard) and you will have to fill them or they can simply be exchanged for full ones.
You will probably pay between around $12 to $30 to refill a 5 lb Co2 tank
How long would the Co2 tank last for?
I would say that on average, with a 10 lb Co2 Tank, you will manage to paint 10 or 12 plastic models depending of the model size. In terms of times, a 10 lb tank will last about 10 hours of continuous airbrushing at 25-30 psi.
If you are an t-shirt artist, you would expect to airbrush continuously for 6 to 8 hours with a 20 lb Co2 tank running at 40-50 psi.
Co2 tank safety precautions:
Co2 can potential be dangerous. Because CO2 displaces oxygen, it is not recommended to airbrush in a confined environment with CO2 without fresh air ventilation. Without fresh air ventilation, the CO2 content will rise–at first making breathing difficult and making you very tired. Eventually you could pass out!Co2 tanks should be carefully transported, and obviously you should avoid dropping them. They should be securely chained or blocked into position when you are using them or even preferably for storage.
Have a look at some of those frequently asked questions about Co2 tank usage
A Co2 tank for airbrush is portable, can be used if you need to work at an outside event for instance where electricity or noise could be an issue.
But because of their size and weight, they wouldn’t really be an option for you if you want to work home .
Compressors:
This is probably the air supply you should consider if you are planning to get started with an airbrush.
You can find compressor with tank, without tanks, some of them silent other rather noisy. Low-pressure air compressors (less than 150 or less), Medium-pressure air compressors (151 psi to 1000 psi) or even high-pressure air compressors (more than 1000 psi) Like the choice for an airbrush, the choice the compressor will depend really on the type of work you are going to do with it. Different artist would have different needs.
Make sure you check out my Airbrush Compressor Buying Guide
They are few questions you should ask yourself before buying a compressor:
Airbrush Compressor for what application?
Do you need to paint large area? Then you will probably be better with a compressor with a tank. Small area? Paint on body? (You are going to need a compressor with very low air pressure, a regulator)Nails? Spray cars? Or even spray food coloring?
Airbrush Compressor: What about the noise?
Are you planning to spray on plastic models in the evening time when your kids are in the room next to you trying to go asleep? Is your wife or room mate watching TV in the next room? In that case, believe me, you should consider buying a silent compressor. This will help you greatly not having your wife giving out hell to you and your room-mate not asking you to live the house!

How long are you going to spray continuously for your project?
20 0r 30 minutes?, in that case a compressor with a large tank will be required. Or are you only going to spray for a minute or 2?
The medium
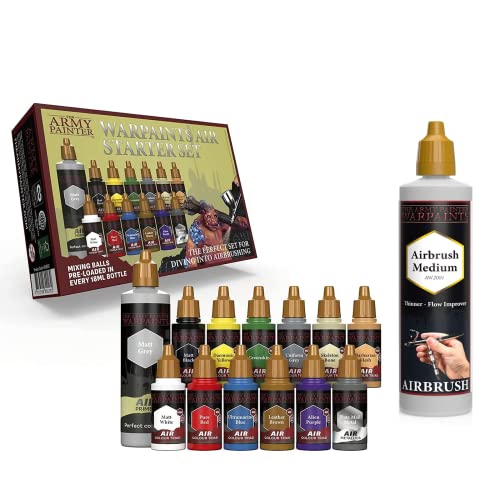
The medium would be the type of color liquid material that can be sprayed with the airbrush. Typically, the medium would be paints, which could be watercolor paints, acrylic paints, oiled based paint, gouache, inks , urethane or even food coloring.
They key point here when you start airbrushing is the use the correct combination of medium for the specific surface you are going to spray onto. You can spray on anything really: wood, on skin, on paper on canvas, but you need to ensure that the medium you use is compatible with the surface.
All paints will have to be thinned to the proper consistency before going through the airbrush or else you might clog your airbrush. But thankfully, most paint manufacturers have a range of airbrush ready paints that won’t need to be thinned
Check out my post about the best airbrush paints for plastic models
A Support
You can really paint on all kind of support with an airbrush. You will just need to make sure that you use the right paint for that specific support. Some example of support can be:
- Airbrushing t-shirt
- Paper or cardboard
- Wood
- Automotive surfaces
- Airbrushing on leather
- Railway models
- Skin
- Cake
Other Accessories
There are also other accessories that you should consider when you start airbrushing. Some are optional and can be bought at a later time but some other are really a must I should be purchased along with your airbrush.
An Air Hose
The air hose is one of those airbrush equipment that you will have to get. The hose helps connect your airbrush to your air source, likely your airbrush compressor.
Make sure your hose is long enough to cover the distance between you compressor and were you want to use your airbrush.
Also make sure that the airbrush brand you fits your hose or-else you will need to purchase an adapter.
Without going into too much details because this could be the subject of a full article, there are different standards in terms of threads size depending of your geographical location:
- NPT (National Pipe Taper) is standard for pipe fittings in the U.S whereas
- BSP (British Standard Pipe) is the U.K. standard for pipe fittings.
BSP threads are a bit smaller than the NPT threads so you could screw an 1/8 BSP male into an 1/8 NPT female.But you will need a good bit of Teflon tape on top of it to secure the connection and avoid any air leaks.
Master, Iwata, harder & steenbeck or Grex airbrushes use 1/8″ BSP connection, whereas Badger, Paasche and Aztek airbrushes, use their own proprietary thread size.
Badger airbrushes have male M5 0.5 mm thread size, Aztek uses M3 0.3 mm thread size and Paasche uses approximately M7 1.0 mm thread size.
Beware that in the US most compressor use 1/4″ NPT as an outlet and they often come with a 1/4″ NPT hose for the compressor.
So lets take that following scenario: You have a Badger airbrush along with a compressor from an US hardware shop with a 1/4” outlet and you wonder what sort of hose you should get:
In that case you would need to get an air hose with 1/4 inch one end and 1/8 inch the other end and buy the Badger Co. 51-042 Quick Disconnect Coupler to connect it to your airbrush. With this Quick disconnect coupler, there is a 1/8” to Badger adapter on the female disconnect making it possible to connect it to any any standard 1/8” airbrush hose.
Or you could just use a badger hose instead, with the same Badger Co. 51-042 Quick Disconnect Coupler to connect your airbrush.
Air filter and moisture trap:
It is essential that clean and dry air goes through your airbrush in order to protect your project work. You can buy them cheap enough. Some moisture trap can be connected to the compressor, other can be connected directly to the hose. Without a inline moisture trap, condensation can build up in the line and shoot through your airbrush directly onto you model, minis or whatever you are working on. . This moisture will over-dilute your paint and ultimately could ruin your paint job!
An air regulator:
Ideally you will want to be able to set up the air pressure exactly the way you want. Can be very important for instance if you are a make-up artist as you will spray directly onto someone face.
The quick Release(disconnect):
This is a very popular items that is not absolutely necessary but that is SO useful. It’s purely a luxury but I can only highly recommend it. The quick release system allows you to quickly disconnect your airbrush from from your airbrush hose.
You can use the quick disconnect to connect the compressor to the hose, hose to filter/regulator, and filter/regulator to airbrush hose connections.
The quick release system is great for swapping between airbrushes quickly and easily. Also ideal for connecting airbrushes with different thread sizes to one hose system.
The way it works is very simple: it is a spring-loaded mechanism that allows the male end (called the tail) to detached from the female end. The female end is attached to the airbrush hose and the male end is attached to the airbrush. The other good thing about this quick release system it allows the airbrush to swivels helping to eliminate hose kinks.
Stencils:
In airbrushing, when using a stencils you call this frisketing. You use stencils or frisket film for masking certain area of your work while airbrushing. If most of your work is going to be freehand, it is always nice to have some generic stencils for circle or curved shapes for instance.
Airbrush Tools:
Hobby knife:
You might want to inverts in a set of hobby knife or cutting knife. They help to get precise, detailed cuts on a wide variety of light to medium weight materials. Those hobby blades are used for delicate, precision cutting, detailing, trimming and stripping.
Cutting mat:
A cutting mat is also something that you should consider, especially if you are into model making.A cutting mat provides a long-lasting, non-glare surface that can be cut and slashed constantly without showing marks or cutting lines. This will save you from damaging the table you are working on.
Airbrush pipettes
Airbrush pipettes are great to transfer small quantities of paint into the airbrush cup. If you don’t use a pipette, pouring paint from the pot to the airbrush cup can be very messy. Plus you will waste paint.You can lso use them for mixing or thinning your paint so that you know exactly the quantity of fluid you add.
Cleaning materials:
Keeping your airbrush clean is essential and they are some basic equipment that you should put on you shopping list. From the basic Q-tips , pipes cleaners, cleaning brush set to the appropriate cleaning agent that correspond to the type of paint you are using, there are quite a few things you need to think about.
If you are using water based or acrylic paints you might use the Iwata-Medea Airbrush Cleaner. I recommend that you use this along with the Iwata-Medea Cleaning station or the Iwata-Medea Universal Spay Out Pot. The cleaning station is basically a closed container with a little rubber hole in which you insert the airbrush nozzle to spray. It also has handle to hold the airbrush. So you can spray in this container and avoid messing up your work place with the over spray.
Check out my guide “How to clean your Airbrush” to have more information about this subject.
Airbrush safety:
Airbrush respirator:
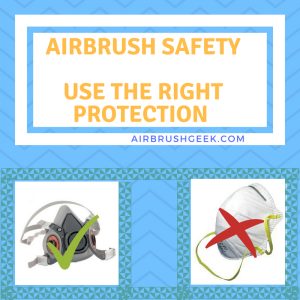
Like it is in most companies nowadays, health and safety is an important factor to consider especially when it is your own health you are talking about! When spraying paints you might inhale particles that can be harmful for your lungs.
For example, if you are planning to airbrush leather dye, you absolutely need to buy a proper airbrush respirator. You are going to atomize a poisonous dye that can do some serious damage if it gets into your lungs .
To protect yourself from the over-spray, use a proper airbrush respirator.This is true also if you use solvent,enamel or lacquer paint. Make sure the face respirator offers a protection from organic vapors (all the nasty chemicals).
Don’t think that using a face mask, like a simple dust mask , will protect you effectively from the over-spay. They are pretty much useless. Get your self a proper airbrush respirator, simple as that.
Those airbrush respirators have a full mouth and noise cover that create a proper seal around you mouth and noise.They also have filters that you can replace.Watch out thought because some model are disposable and other are reusable (you replace the filters). You will be amazed by the amount of paint that those filters will catch when you replace them
Airbrush Booth Kit:
Ideal to avoid messing up the area where you are planning to spray with your airbrush. Although you could make one yourself with cardboard, you might be interested by some ready to buy Spray boot Kit that not only with avoid messing up but have other features like their own ability to extract and control the mist , turn table etc…
You have to read my post about the Best Airbrush Spray Booth
There you go, I think I have cover more or less everything that you need to know to get started. If you think I left out something , please leave a comment below and I will add it to the post. Hopefully you have a better idea now of what is ahead of you and all I can say to you now is : Let’s start airbrushing!

 Amazon.com


